
I Almost Returned My Sony ZV-1
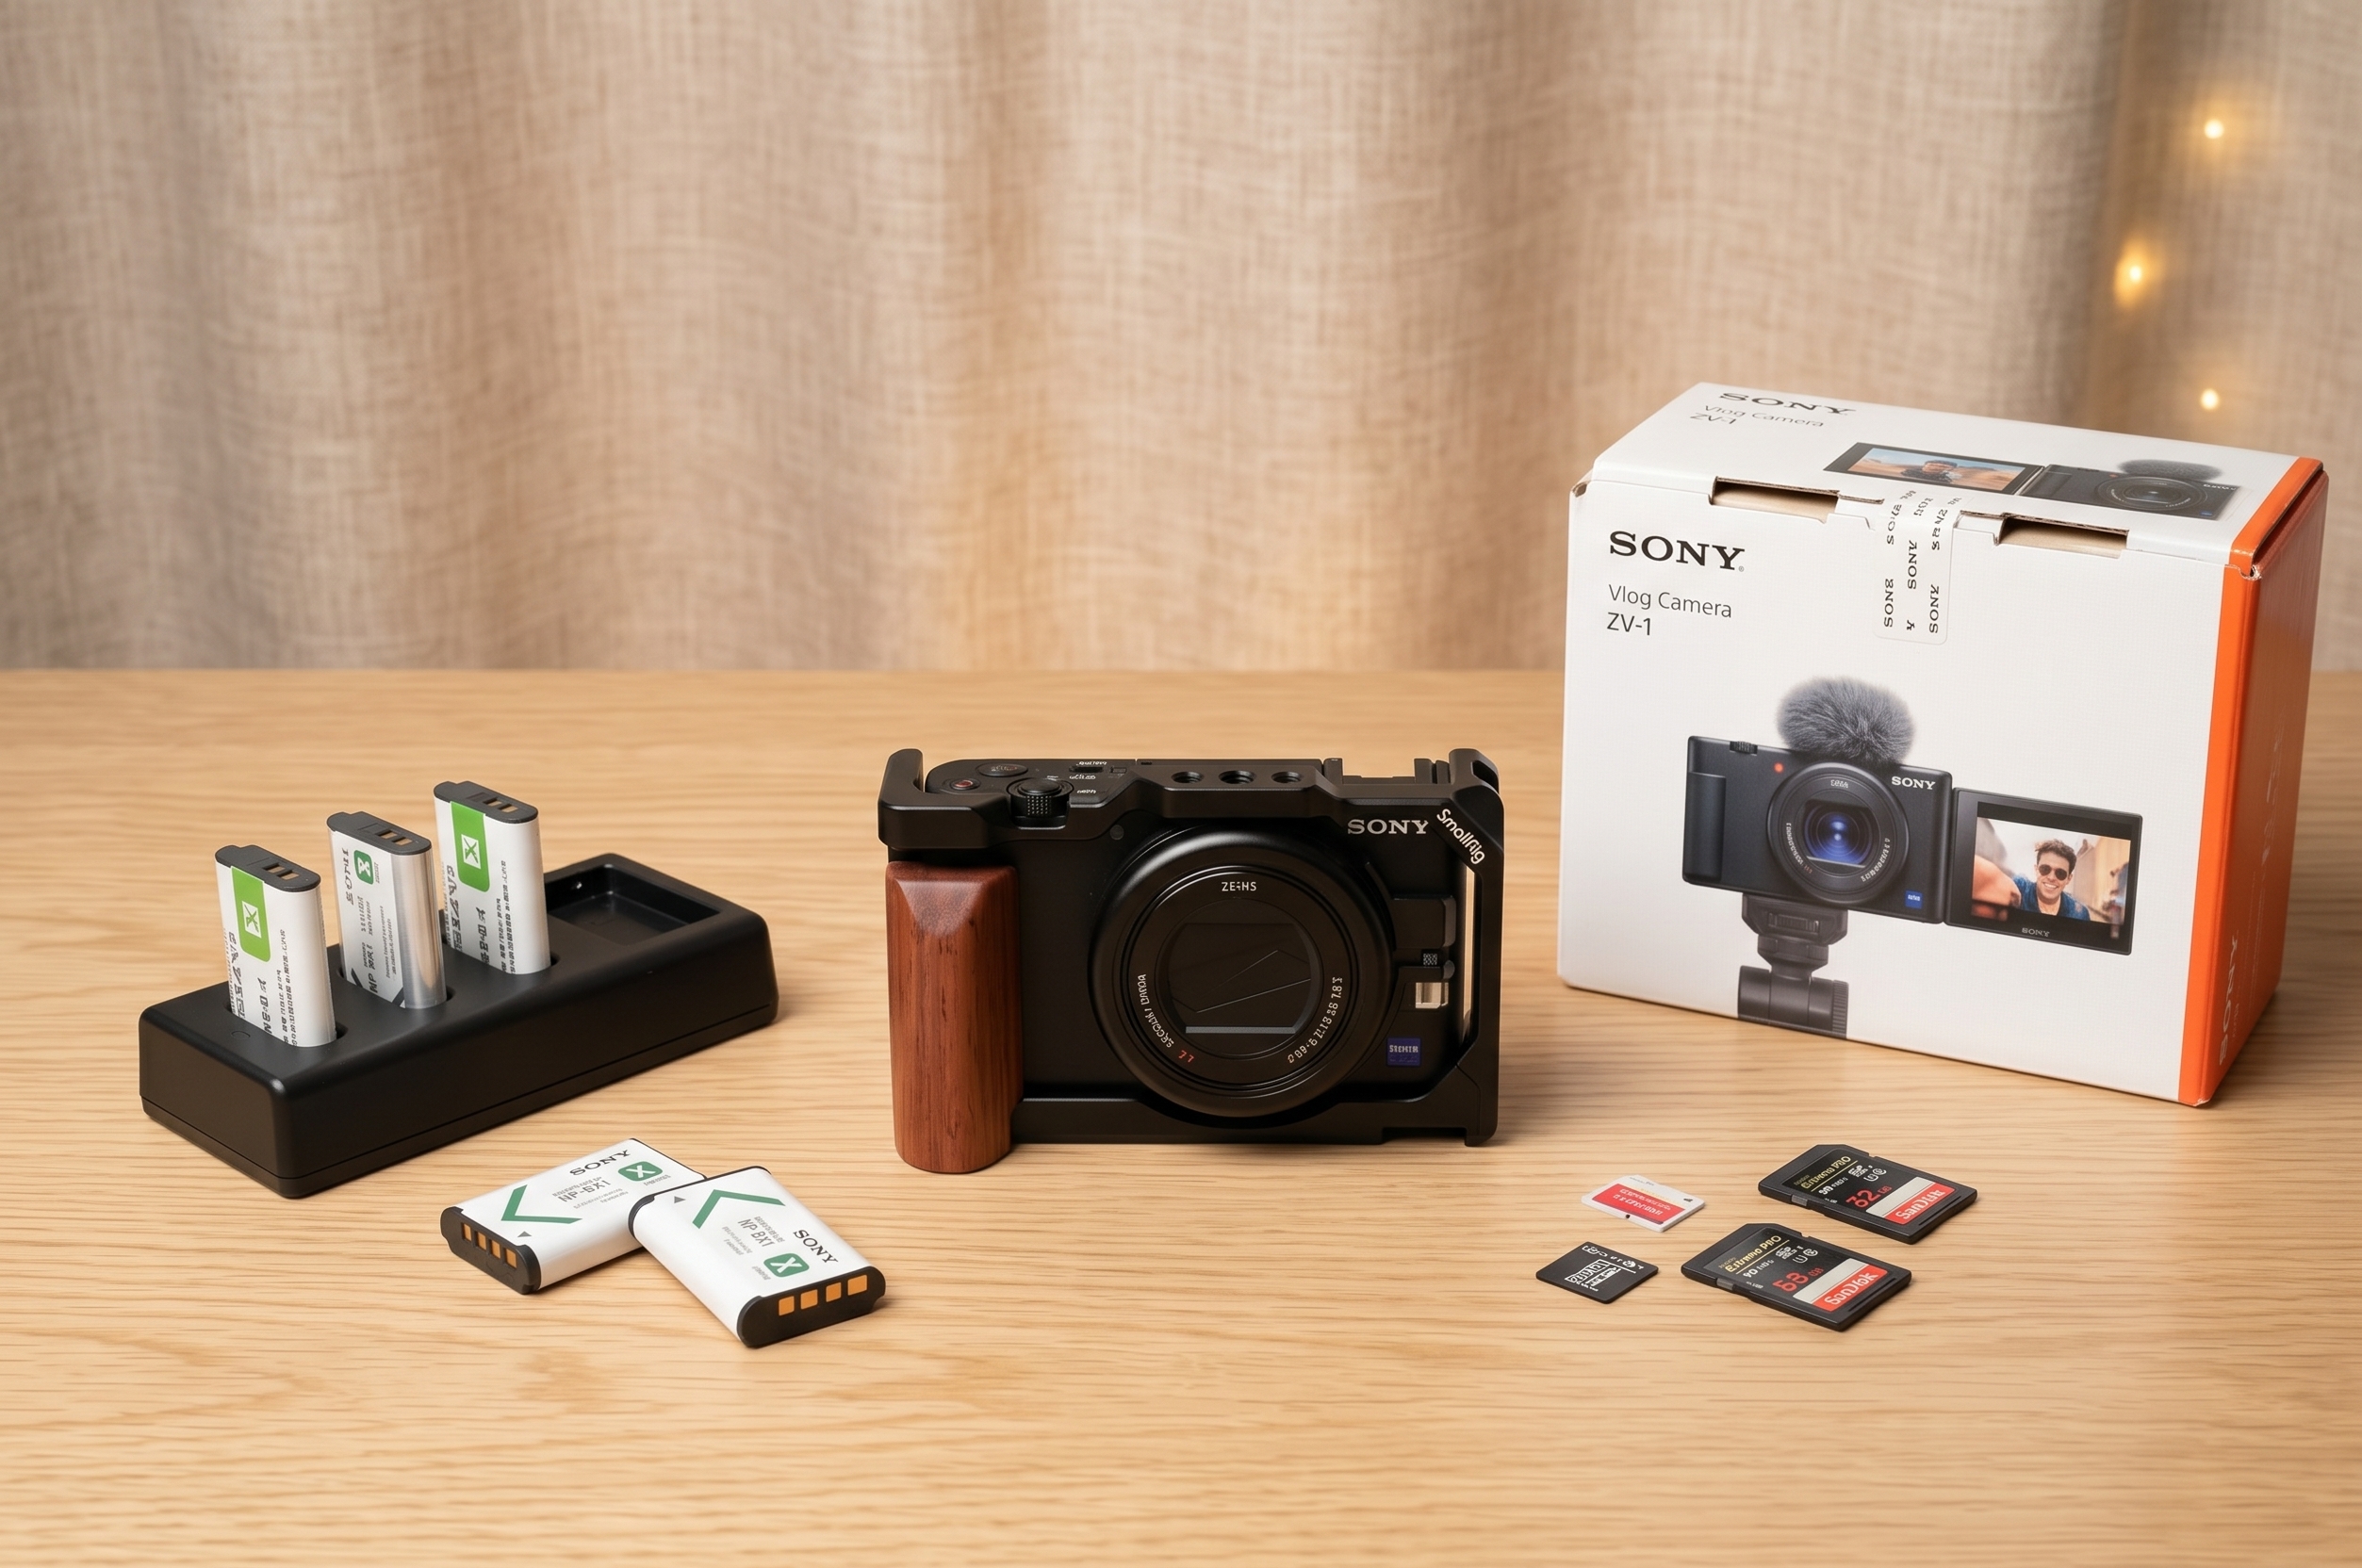
This is the Sony ZV-1. And this is the pile of accessories I had to buy for it. Out of the box, this camera has some real issues. Three of them almost made me send it straight back to the seller, and this post covers what I did about each one, plus what I think is essential to make this popular vlogging camera a usable professional tool.
I bought this camera used about three months ago. I’ve used it almost every single day since then. For what it is, it holds up surprisingly well. The display is still scratch-free, and it does its job. But it’s not perfect, and I had to discover the hard way what it takes to fix its biggest flaws.
Why Bother With The ZV-1 At All?
So why even consider it? It’s a fantastic entry point for anyone graduating from an iPhone. If you want to get into real video and learn to shoot in manual, this is your hands-on classroom. You’re forced to learn the fundamentals: ISO, shutter speed, and aperture. You can’t just point and shoot and expect magic. You have to study and practice, and this camera is a great partner for that.
The image quality is solid. You get a clean 4K picture, which looks great. The major limitation, and a reason I’m eventually moving on, is that it’s capped at 30 frames per second. For professional work, that can be limiting. For vertical content on Instagram or TikTok, it still holds up.
You can also get nice slow-motion footage. It shoots 1080p at 100 frames per second, which gives you a clean four-times slowdown without any AI frame generation. Just be careful. Shooting at high frame rates creates huge files. A quick 10-second clip of someone pouring a drink is fine. But filming everything at 100fps will eat your storage budget, and you’ll spend a lot on hard drives.
The First Problem: Your Camera Will Shut Off
This is the first issue I ran into the moment I unboxed the camera. I turned it on, set it to 4K, and started recording. Five minutes later, it shut off. An overheating warning popped up, and the camera just died. This is the default setting: the camera is programmed to shut down to protect itself from heat after only five minutes of 4K recording. That is useless for real shooting.
How to Fix The 5-Minute Recording Limit
This is a deal-breaker if you don’t know how to fix it. Luckily, it’s just a software setting. You have to dive into the menu and find the heat management settings. You need to change the ‘Auto Power OFF Temp’ from ‘Standard’ to ‘High’. This tells the camera you’re willing to let it get warmer to record for longer.
Making this change is critical. But you also need to help the camera physically. I recommend always shooting with the flip-out display open and away from the camera body. This allows heat to dissipate more easily from the casing. With this setting changed and the screen out, you can record in 4K for much longer without interruptions.
The Second Problem: Battery Life Is Straight Trash
If you look up any review of the ZV-1, you’ll hear the same thing. The battery life is trash. I agree. The camera uses tiny NP-BX1 batteries, and they just don’t last. With a single battery, I could never get through a whole shoot. I wouldn’t even last half a day.
But this is not a reason to avoid the camera. The fix is easy and cheap. I went on Amazon and bought a third-party charging kit. It came with a dual-slot charger and three extra batteries. Now I have four batteries in total, and that’s enough to get me through a full two to three-hour shoot with continuous filming. I might even have a battery left over.
This is the number one accessory you must buy. Don’t use the ZV-1 without it. Having multiple batteries ready to go makes your life much easier and removes the anxiety about your camera dying mid-take.
The Third Problem: The Tripod Mount Is A Joke
This next issue drove me insane. The tripod mount on the bottom of the camera is placed right next to the battery and SD card door. This is a big design flaw. Even if you use a very small tripod plate, it will block the door completely. You cannot access your battery or your memory card.
Imagine this workflow: you have your camera perfectly balanced on a gimbal or set up on a tripod for the perfect shot. Then your battery dies. You have to unmount everything, unscrew the plate, swap the battery, screw the plate back on, and then remount and re-balance your entire setup. It’s slow, annoying, and just plain bad design.
The SmallRig Cage: A Must-Have Upgrade
The solution is the SmallRig Cage. This cheap adapter made a big difference for me. You attach it to the camera, and it solves the problem right away. It shifts the tripod mount away from the door, so you can access your battery and SD card without taking anything apart. I pretty much never take this cage off.
But it does more than just fix that one issue. It gives you a lot of new mounting points on the top and sides. The best part is that it adds a vertical mounting thread on the side. This allowed me to mount my camera vertically on a tripod to film portrait videos for social media. This is a huge extra benefit that makes the cage worth every penny. It’s my number two must-have accessory.
My Pro Audio and Stabilization Setup
One of the biggest reasons I chose the ZV-1 over other pocket cameras was the audio input. Having that 3.5mm microphone jack is super important. Before this, I had to record audio separately on my phone and then sync it all up in post-production. It was possible, but an annoying workflow. With the ZV-1, I can plug in an external mic and get audio synced directly to my video.
Mastering The Built-In Stabilization
The stabilization on this camera is a chapter in itself. You get a Standard mode and an Active mode. Be warned: Active stabilization crops into your image substantially. This lens is already a bit tight, so that extra crop can be a problem.
Active mode is pretty good for canceling out micro-jitters. If you’re doing the ‘ninja walk’ and trying to be smooth, you can get a clean shot without a gimbal. But it’s not magic. If you’re running, the footage will still be unusable. For the best quality, you need a gimbal. And here’s the most important tip: if you use a gimbal, turn all in-camera stabilization OFF. If you don’t, the camera’s stabilization and the gimbal’s motors will fight each other, and you’ll get jerky footage.
The Gimbal Combo: DJI RS3 Mini
My gimbal of choice is the DJI RS3 Mini. Paired with the ZV-1, it works very well. The camera is very light, and the SmallRig cage adds just enough weight to help the gimbal perform better. But there’s a crucial trick to making it work.
You must balance the gimbal while the camera’s lens is fully extended. When you turn the ZV-1 on, the lens pops out, and this changes the weight distribution. If you balance it while the lens is retracted, it will be off-balance the second you turn it on. So turn the camera on, let the lens extend, and then balance the gimbal. Do this, and you will get much smoother shots.
Final Thoughts: Buy It Smart
With these key accessories, the Sony ZV-1 goes from a frustrating gadget to a powerful tool. A battery kit is mandatory. The SmallRig cage is a must-have. And a gimbal like the RS3 Mini gets the most out of the camera. I recommend this setup, but don’t pay full price. I bought most of my gear used on eBay and saved a lot of money. You can get a camera in great condition and still save a bunch. Fix the camera’s core flaws, and you’ll have a capable creative machine.
This post may contain affiliate links. These links are marked with an * and I may earn a commission from qualifying purchases.